Thanks for reading, and I can't wait to come home!
Thursday, January 31, 2013
31 Day Challenge - Octopus's Garden
Hey all! Today's challenge was to create nail art that's inspired by a song. This manicure is inspired by Octopuses's Garden by The Beetles. Who doesn't love The Beetles?
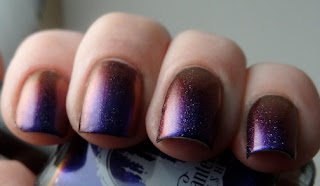
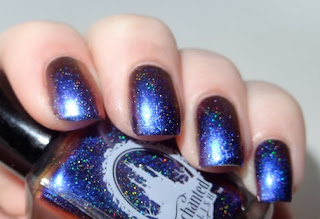
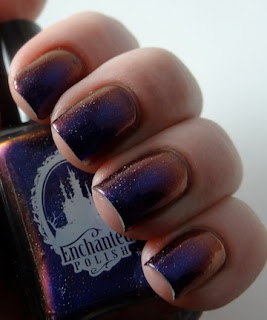
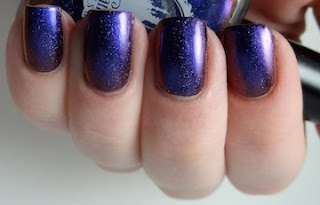
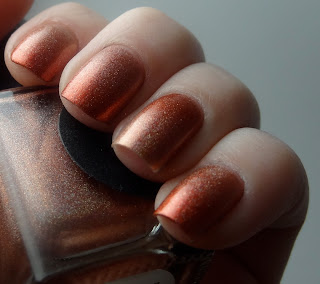
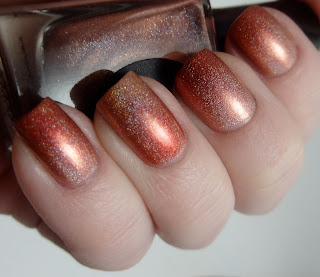
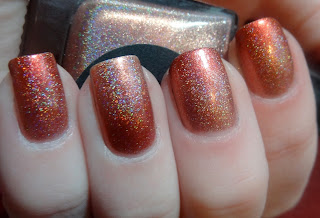
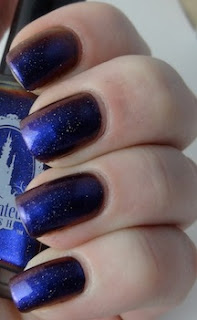 This is Enchanted Polish Octopuses's Garden over A England Camelot. Sorry for the tip wear, this manicure was a few day's old by the time I was able to photograph it. Can you believe these are all pictures of the same polish? The multichrome in this polish is crazy. In addition to being a gorgeous multichrome, it is also holographic! I was going to add some octopuses to this manicure, but I couldn't bring myself to cover up the base color. I hope you all don't mind!
Thanks for reading, and I can't wait to come home!
Thanks for reading, and I can't wait to come home!
Labels: Enchanted Polish
Wednesday, January 30, 2013
31 Day Challenge - Inspired By a Color
Hey everyone! I'm away in California for the next few days, but that won't stop me from sharing my addiction with all of you! The nail polish color that inspired this nail art is Deborah Lippman's Ray of Light, a blue jelly with loaded with flakies!
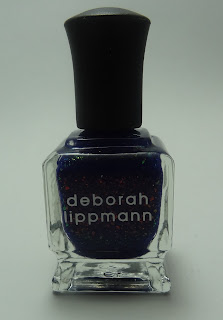
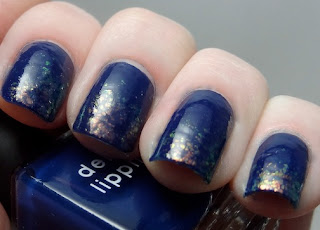
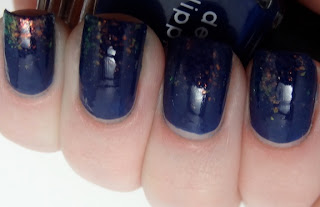
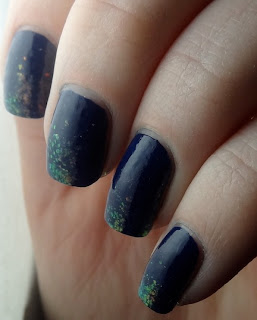 Sorry for the weird angle on the last picture, but I felt it was the most representative of what the manicure looks like without direct lighting. I gradiented Deborah Lippmann Ray of Light over Deborah Lippman My Prerogative. I love this look, I will wear again!
Thanks for reading!
Isn't is beautiful? When I saw the bottle, I had to own it. I'm told there's a near dupe out now at Urban Outfitters, so for those of you who don't want to shell out $18 for this gorgeous shade, look into UO Mystic.
I decided to try a flakie gradient. Although I am very accustomed to gradients, I've never tried it with flakies. I am happy with the result!
Thanks for reading!
Labels: Blue, Deborah Lippmann, Gradient
Tuesday, January 29, 2013
31 Day Challenge - Water Marbled
Hey everyone! I'm flying out to California later today. There's a storm warning tonight, so I'm sure there will be delays...hopefully just not another cancellation. Is anyone else deathly afraid of planes? No matter how many flights I take, I still get petrified with fear at the slightest bit of turbulence.
Anyway, this was my first time trying out water marbling! People who water marble often are really patient, I must say. It takes a while to get everything set up, and let's not even get started on the clean-up process...
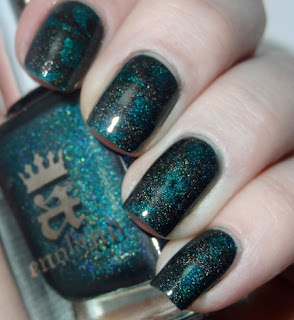
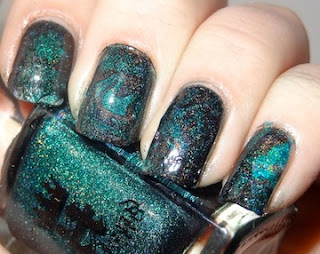 Isn't it horrifying? I couldn't even get it cleaned up reasonably. For the fake water marble, I used A England Saint George and A England Bridal Veil. I used these same colors for the water marble, but I also used Nfu Oh 61, not that you can see it at all. I think it may actually have been the cause of a lot of my water marbling issues...it behaved very oddly in the water. That doesn't surprise me though, as (ironically) it behaves pretty oddly on the nails too. It's a shame, I was looking forward to finally finding a use for it... I think we're all in agreement that I shouldn't try water marbling again without some serious supervision.
Thanks for reading!
Anyway, this was my first time trying out water marbling! People who water marble often are really patient, I must say. It takes a while to get everything set up, and let's not even get started on the clean-up process...
Not too bad, right? Well, these aren't actually water marbled. These nails were done using a stamp that imitates a water marble type design. This design is found on BM-320. I don't want to show you what my attempt at water marbling, but for the sake of the challenge...
Thanks for reading!
Monday, January 28, 2013
31 Day Challenge - Galaxy Nails
I can't believe it's already day 19 of the 31 day challenge! That means I've been blogging for 20 days now...time flies. I just want to thank all of you followers who have been with me through my early stages of nail polish blogging, you guys seriously keep me going! At this point it feels sort of lonely, but it's nice to know that you're out there!
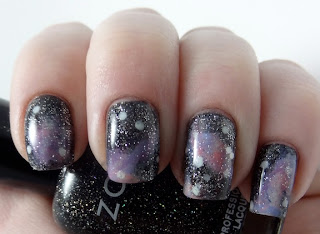
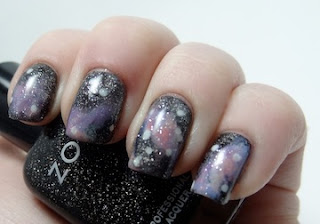
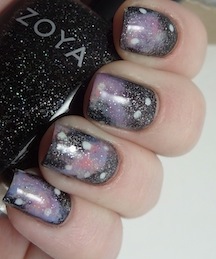 These are my first attempt at galaxy nails. They're not super crazy like some of the galaxy nails that I have seen. Some people use something like 20 or 30 different polishes for their galaxy nails; I prefer to keep things far simpler. Maybe that's just laziness talking, but I prefer nail art that's quick and easy to do! I can say that this qualifies under both categories. I used Zoya Storm as the base, then I sponged on OPI My Boyfriend Scales Walls, Butter London Muggins, Butter London Sprog, Zoya Neely and Essie Haute as Hello. The dots are a combination of using a dotting tool to place dots with My Boyfriend Scales Walls and the hex glitter from a coat of OPI Pirouette My Whistle on top.
Side note about Zoya Storm...the formula is kind of awful. Hopefully that's only the case for my bottle, but it was really hard to apply on account of being too thick and it came on patchy. Not to mention the very scattered holo is nearly impossible to see in most lighting. I really wanted to love it...but I can't recommend it, especially with far better (formula and appearance-wise) black holos on the market.
Thanks for reading!
Labels: Butter London, Essie, OPI, Zoya
Sunday, January 27, 2013
31 Day Challenge - Half Moons
Happy weekend to everyone! I finally got my interview at Berkeley rescheduled, so I'll be away from the blog Tuesday-Thursday. In a way, I am glad that my flight was cancelled since I got to stay for the entire Sundance Film Festival! Yay! Tomorrow is the last day though...
Today's challenge is for a half moon manicure. I've never done a half moon manicure, mostly because I don't like the look of them. It's nice to try something new though! I almost wore these to my ill-fated interview out of sheer laziness, but I decided to wear my favorite nail polish for good luck instead (I'll be posting a swatch of it later this afternoon!)
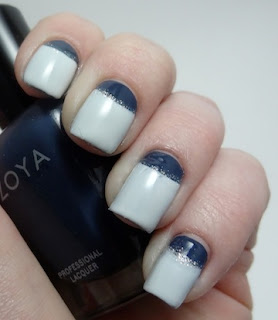
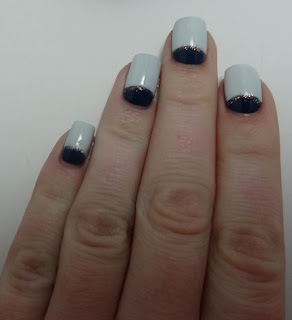
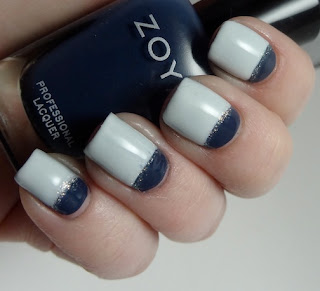
Today's challenge is for a half moon manicure. I've never done a half moon manicure, mostly because I don't like the look of them. It's nice to try something new though! I almost wore these to my ill-fated interview out of sheer laziness, but I decided to wear my favorite nail polish for good luck instead (I'll be posting a swatch of it later this afternoon!)
To create the half moons, I began by painting my entire nail with two coats of Zoya Natty and then used nail guides to paint one coat of OPI My Boyfriend Scales Walls over it. I thought the manicure looked plain, so I used a Stripe Rite glitter striper to add a little extra touch to the manicure. Do you think the glitter was a good idea, or should I have just let it be without it?
Thanks for reading!
Saturday, January 26, 2013
31 Day Challenge - Glitter
WARNING: This manicure is really ugly and scary and horrible. When I saw that the challenge was glitter, I died inside a little. I dislike glitter a lot. Unsure of whether "glitter nails" meant using a glitter polish or actually applying glitter, I did both to create this monstrosity.
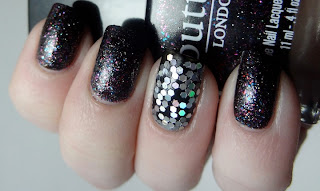
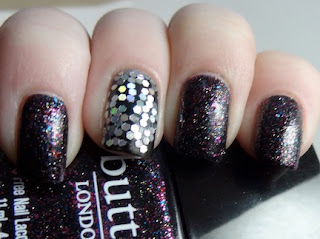
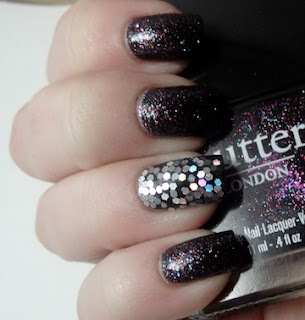 This is Butter London The Black Knight and an accent nail of A England Camelot dipped into a jar of holo-silver glitter. The hex glittet looks way more holo in person. Also, The Black Knight is one top coat hungry polish! I used one really thick coat here, but it still looks really dull... I imagine it would look just right with about four more layers of top coat. And I apologize for the scary long nails...this is my right hand and I have a bad habit of letting these nails run rampant.
Thanks for reading!
Thanks for reading!
Labels: A England, Butter London
Friday, January 25, 2013
31 Day Challenge - Tribal Print
I'm sad to say that my flight to Berkeley was cancelled yesterday due to extremely icy conditions, so I will be missing my interview...I had this post ready before the cancellation, so I will post it nonetheless.
Today's challenge is tribal print nails. I tried a really cute freehand design, but it wasn't quite what I wanted so I decided to play it safe with some metallic stamping.
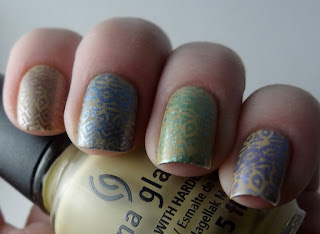
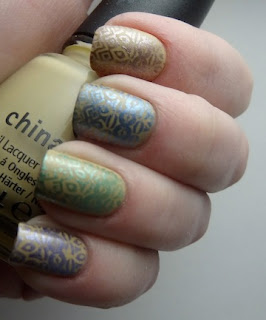
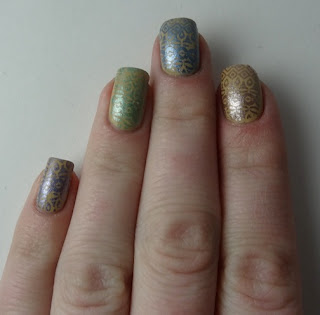 I used China Glaze Kalahari Kiss as the base for the nails in this manicure. For the tribal print, I used the BM-315 with a few metallic polishes I found at Ross the other day. I'm not sure about the quality of the polishes since they were $5.99 for seven polishes, but they worked great for stamping! From the pinky to the index finger, JLB Purple Rain, Jade, Deep Sea, and Hot Coco were used.
Thanks for reading!
Today's challenge is tribal print nails. I tried a really cute freehand design, but it wasn't quite what I wanted so I decided to play it safe with some metallic stamping.
Thanks for reading!
Labels: China Glaze, Stamping
Thursday, January 24, 2013
31 Day Challenge - Delicate Print
Hey everyone! I would like to start off by saying that this nail art comes from The Polished Perfectionist and not from my brain. I wish I could come up with something so beautiful. The moment I stumbled upon her blog and saw this manicure, I was in awe. I knew I had to recreate it, and the 31 Day Challenge request from delicate nails brought this to mind. Hopefully this constitutes delicate print; honestly, I have no idea what is meant by "delicate print" nails.
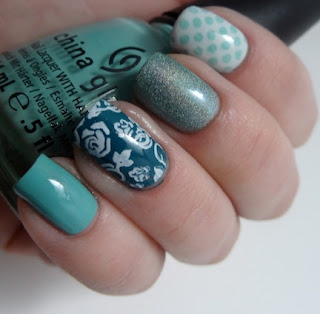
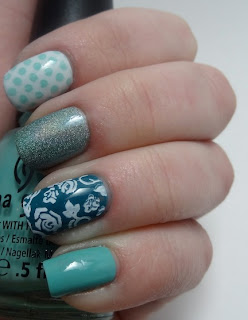
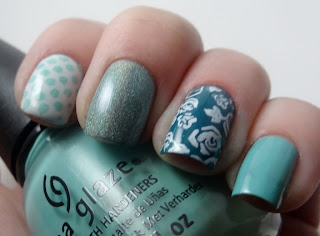
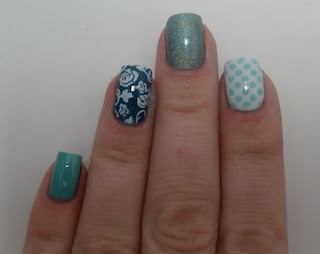
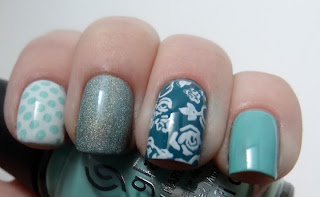 On the pinky finger is one coat of China Glaze For Audrey. The ring finger is one coat of Illamasqua Muse and Konad Special Polish in White with Konad stamping plate m65. The middle finger is three coats of Butter London Fishwife. Finally, the index finger is two coats of OPI My Boyfriend Scales Walls with polka dots in For Audrey from BM-19.
I cannot express how much I love this manicure. Not only are the colors super gorgeous, but the manicure itself was so easy to do, especially with so many one coaters. I will definitely be wearing this again.
I cannot express how much I love this manicure. Not only are the colors super gorgeous, but the manicure itself was so easy to do, especially with so many one coaters. I will definitely be wearing this again.
Labels: Butter London, China Glaze, Illamasqua, OPI, Stamping
Wednesday, January 23, 2013
31 Day Challenge - Flower Nails
Hey all! How's everyone's week shaping up so far? I must confess that I will be away from my blog for the next few days. I already have posts scheduled for the next few days, so you'll still see updates even though I'm not here. The reason for my absence is that I am flying to California for an interview at Berkeley. I'm hoping to get my PhD in Biology there. Wish me luck!
Day 14 of the 31 Day Challenge calls for flower nails. As usual, I had to make a few attempts before I got anything borderline presentable. I tried to work with pressed flowers, but they just kept breaking and looking lumpy when I put top coat on them...Has anyone had any luck with them? I'd love some pointers!
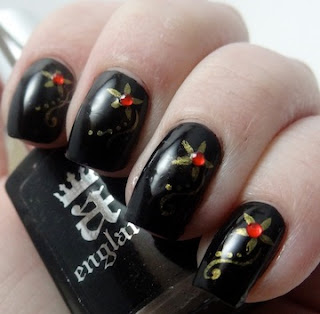
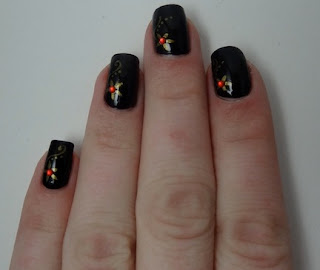
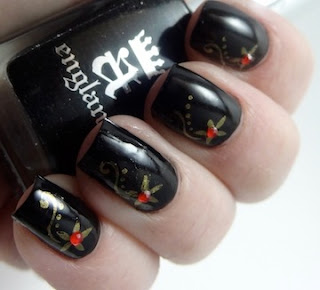
Day 14 of the 31 Day Challenge calls for flower nails. As usual, I had to make a few attempts before I got anything borderline presentable. I tried to work with pressed flowers, but they just kept breaking and looking lumpy when I put top coat on them...Has anyone had any luck with them? I'd love some pointers!
Once I had given up on the pressed flowers, I decided to do a black and gold manicure. This is two coats of A England Camelot with Konad Special Polish in Gold and Konad Stamping Plate m4. Once I had stamped on the gold design, I felt that the manicure was missing something, so I put some red rhinestones in the middle of the flowers. I had a really hard time getting the design to transfer, so I actually had to freehand most of the ends of the petals. Not the greatest, but not too bad considering the wonky nail art brush I had to use...It was my first time using the brush, and it became unusable after about three petal's worth of painting. That's no good!
Thanks for reading! I'm especially excited about the manicure I get to show you all tomorrow! Until then...
Tuesday, January 22, 2013
31 Day Challenge - Animal Print
Hey everyone, I'm back on track now! I went to two more Sundance films today, both documentaries. They were quite good, most especially one called Dirty Wars. It's been picked up for release in theaters later this year, you should all check it out if you get the chance! It's very informative, but I won't go into the details since nobody wants to hear about war on a nail polish blog...
Day 13 of the 31 day challenge is animal print. Personally, I think animal print is kind of tacky. So why not go further and make the manicure even more tacky with the help of holo for some rainbow zebra print nails?
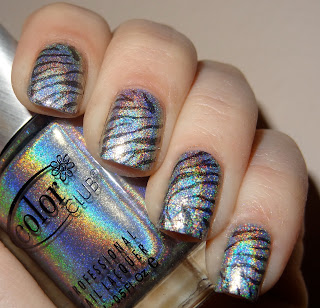
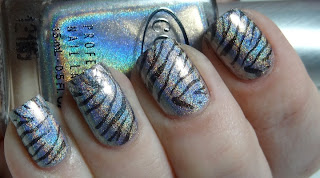
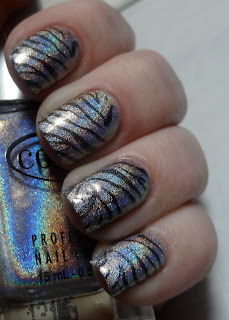
The silver holo is Color Club Harp On It. The Zebra stripes I used are on the Konad stamping plate m57. I used Cirque Alter Ego, a black holo, for the zebra print. You can't really see it that well since it is significantly less holographic than the Color Clubs from the Halo Hues collection. For those of you who don't have any of the polishes from the Halo Hues collection, get some!! They are very high quality holographic polishes...Cheaper and easier to apply than the Layla holographics and certainly the NfuOhs. No special base coat required, just put them on like regular polish and enjoy the holographic goodness!
I think I'll post some Halo Hue swatches once this challenge is over. I know they'll be old news by then, but they're just so pretty.
Thanks for reading!
Day 13 of the 31 day challenge is animal print. Personally, I think animal print is kind of tacky. So why not go further and make the manicure even more tacky with the help of holo for some rainbow zebra print nails?
I think I'll post some Halo Hue swatches once this challenge is over. I know they'll be old news by then, but they're just so pretty.
Thanks for reading!
Labels: Cirque, Color Club, Holographic, Stamping
Monday, January 21, 2013
31 Day Challenge - Stripes
Hi all, sorry for the late post. I woke up really early yesterday to try and get tickets to the world premiere of a movie called The East. Fortunately, after about 8 hours of trying, I was finally successful. In the end, it only cost us all 15 dollars a ticket to get in, not too bad!
I must say, attending a movie premiere is really exciting. Pretty much everyone involved with the movie was there, and there was a Q&A with the actors and the director after the film. As much fun as it was, I think that will be a one time deal for me. It was so exhausting that I slept for 13 hours straight! That's my excuse for almost skipping a day of the 31 day challenge.
Without further ado, here are my stripe nails!

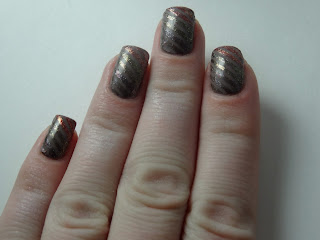
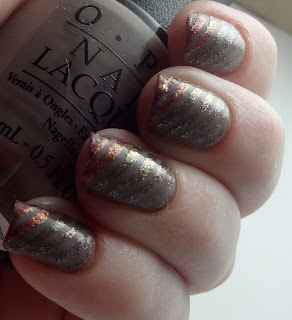 This is two coats of OPI Berlin There Done That with the three Deborah Lippmann polishes included in the Rock this Town set. The colors are Phoenix Rising (bronze), Moon Dance (lavender), and Chain Reaction (green). I think these are only available in the set, you can't buy them individually. I wish you could see the contrast between the brown base and the lavender shimmer better, but I should have used a lighter base color for that. My boyfriend got the set for me for Christmas, and I've been dying to use them all ever since! If anyone is lemming Phoenix Rising, the new OPI Mariah Carey collection has a dupe called Sprung. I accidentally bought both and got rid of the OPI immediately.
Have a wonderful evening all!
I must say, attending a movie premiere is really exciting. Pretty much everyone involved with the movie was there, and there was a Q&A with the actors and the director after the film. As much fun as it was, I think that will be a one time deal for me. It was so exhausting that I slept for 13 hours straight! That's my excuse for almost skipping a day of the 31 day challenge.
Without further ado, here are my stripe nails!
Have a wonderful evening all!
Labels: Deborah Lippmann, OPI, striping tape
Sunday, January 20, 2013
31 Day Challenge - Polka Dots
Hi everyone! I was excited for the polka dot challenge because I've never used a dotting tool to make polka dots before. I was all ready to try it, but then I got caught up until about midnight, and with no new manicure to show you all! We can't have that, so I present to you another quick manicure, a pastel gradient with a polka dot accent nail.
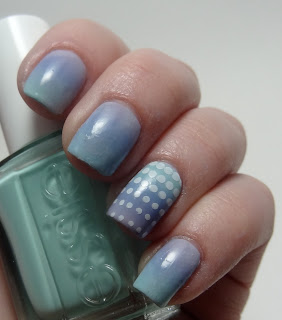
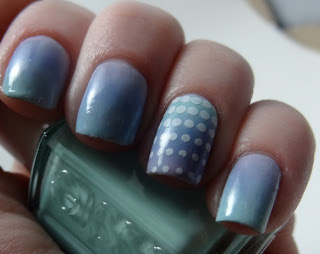
For the polka dots, I used the Konad stamping plate m60 and Konad Special Polish in white. The gradient consists of Butter London Muggins, Butter London Sprog, and Essie Mint Candy Apple. Sorry about the shoddy pictures, I promise I'll do better when my days aren't so hectic and my nails/cuticles aren't in such disarray! I wish I had time to put polka dots on all the nails, I think that would have been really cute. Someday...
For the polka dots, I used the Konad stamping plate m60 and Konad Special Polish in white. The gradient consists of Butter London Muggins, Butter London Sprog, and Essie Mint Candy Apple. Sorry about the shoddy pictures, I promise I'll do better when my days aren't so hectic and my nails/cuticles aren't in such disarray! I wish I had time to put polka dots on all the nails, I think that would have been really cute. Someday...
Labels: Butter London, Essie, Gradient, Stamping
Saturday, January 19, 2013
31 Day Challenge - Gradient
Day 10 of the 31 Day Challenge is gradient! I almost didn't get this challenge done today because I was out so late at Sundance. But then I saw that the challenge was for gradient nails, and I decided to go for it since gradiented manicures are so easy to do! Gradients are probably my favorite kind of nail art simply because they're hard to mess up and so aesthetically pleasing. No joke, this manicure took me about 15 minutes from start to clean-up, and most of that time was spent waiting for the base to dry.
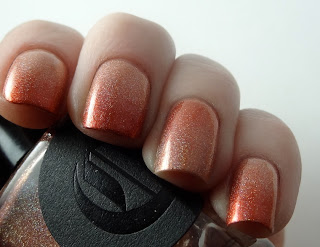
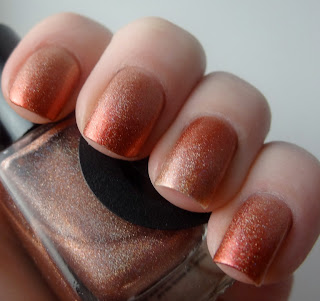
 The last picture isn't the best, but I wanted to make sure you could see the holo goodness! I'm still very new to taking nail polish photos, and holos are particularly difficult to capture, but this is honestly how holo this manicure is in dim lighting. It's amazing! I can't wait to see how crazy holo this is in the sunlight (if we would ever get any...) This gradient was done using two exceptional indie brand polishes, Cirque Cypress and Takko Lacquer Va Va Voom.
 Bonus picture, I met Michael Cera at Sundance last night! I love Arrested Development and he's adorable and super nice.
Have a wonderful weekend, and thanks for reading!
Have a wonderful weekend, and thanks for reading!
Labels: Cirque, Gradient, Holographic, Red, Takko Lacquer
Friday, January 18, 2013
31 Day Challenge - Rainbow
Hey everyone! Anyone doing anything exciting this weekend? Tomorrow marks the first day of the Sundance Film Festival, and I'm happy to say that I will be there! This is my fifth year attending the festival, and I'm hoping to finally succeed in stalk... I mean, meeting my celebrity crush. A girl can dream!
Anyway, I'll get back on topic. Day 9 of the 31 Day Challenge calls for rainbow nails, so I present to you my rainbow nail art inspired by The Polished Perfectionist. I wanted to try some gradiented stamping, but a friend of mine borrowed the only orange polish that would have worked. After much internal struggle, I settled with this look.
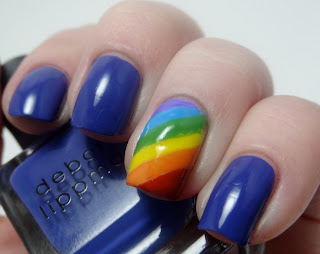
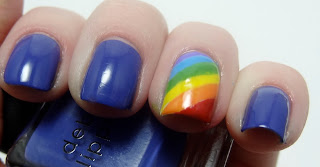
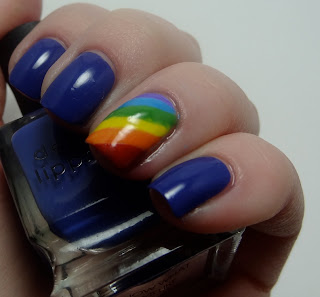
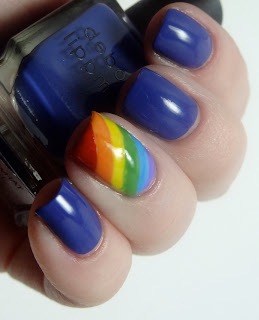 I started off by painting my accent nail with OPI My Boyfriend Scales Walls and then I drew on diagonals for the different colors using the brushes that came with the polish. No fancy acrylic paint or detailing brushes, I'm too lazy for that! I also could have used tape to have cleaner lines but I'm impatient and didn't want to wait for everything to dry. Someday I will have the patience to make this perfect, but I'm exhausted so I finished the manicure by painting the other nails with Deborah Lippmann I Know What Boys Like. For the rainbow, I used to Butter London Pillar Box Red, Zoya Arizona, Color Club Almost Famous, OPI Green-Wich Village, OPI No Room for the Blues, and Color Club Pucci-licious. All of these polishes worked great, aside from Green-wich Village which was too watery and required two coats whereas the rest took one.
Check out my wonderful pals who are also participating, Raine and Jonochi at Lacquer Lily and Just Add Polish. Thanks for reading!
Anyway, I'll get back on topic. Day 9 of the 31 Day Challenge calls for rainbow nails, so I present to you my rainbow nail art inspired by The Polished Perfectionist. I wanted to try some gradiented stamping, but a friend of mine borrowed the only orange polish that would have worked. After much internal struggle, I settled with this look.
Check out my wonderful pals who are also participating, Raine and Jonochi at Lacquer Lily and Just Add Polish. Thanks for reading!
Labels: Butter London, Color Club, Deborah Lippmann, OPI, Rainbow, Zoya
Thursday, January 17, 2013
31 Day Challenge - Metallic Nails
Hi all, I am on day 8 of the 31 Day Challenge, and still going strong! Check out my wonderful pals who are also participating, Raine and Jonochi at Lacquer Lily and Just Add Polish.
Day 8 is metallic nails. I had a really difficult time with this challenge. At first I had envisioned a magnetic polish gradient, but I'm too noob at magnetic polish and it looked awful. Next I tried a splatter manicure and I couldn't get that to work without looking like a lumpy mess. I finally settled on painting two foil polishes over black for this metallic look. I'm not super happy with it, but I'd rather not skip a day of the challenge so here it is!
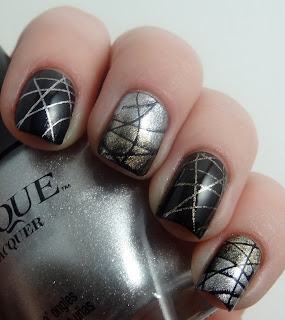
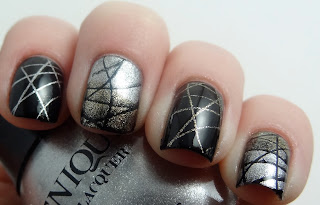
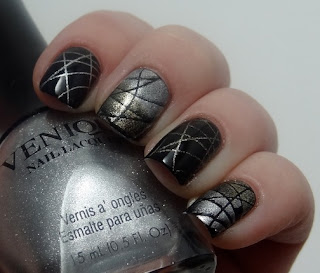
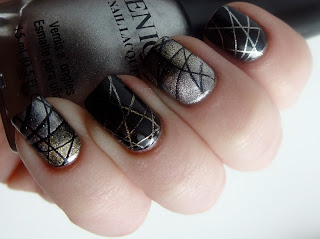 This is Orly Lux and Venique Spike It! over one coat of A England Camelot. Two stamping designs were used for this manicure, and they can both be found on BM-316. I like the predominantly black nails of this manicure better, but it didn't look very "metallic" with such a small amount of metallic polish. As I was looking through my collection, I noticed that it is lacking in foil/metallic shades. Does anyone have a suggestion for a good blue foil? Or a green foil (if that even exists)?
Thanks for reading, and I hope tomorrow's rainbow nails will be more aesthetically pleasing!
Day 8 is metallic nails. I had a really difficult time with this challenge. At first I had envisioned a magnetic polish gradient, but I'm too noob at magnetic polish and it looked awful. Next I tried a splatter manicure and I couldn't get that to work without looking like a lumpy mess. I finally settled on painting two foil polishes over black for this metallic look. I'm not super happy with it, but I'd rather not skip a day of the challenge so here it is!
Thanks for reading, and I hope tomorrow's rainbow nails will be more aesthetically pleasing!
Subscribe to: Posts (Atom)
